Skip to main contentBfloat AI supports publishing your app to the Apple App Store. This guide details the setup steps required for App Store Connect integration.
📘
App Publishing Status
To publish your app, it needs to be set from Draft to Live. See more in Intro to Publishing.
Apple Developer Account Setup
To publish your Bfloat AI app to the Apple App Store, you’ll need to complete the following prerequisites:
1. Create an Apple Account
- If you don’t already have an Apple ID, create one here
- This is your personal Apple account that will be used for all Apple services
2. Enroll in the Apple Developer Program
- This requires a paid membership ($99/year)
- Follow Apple’s official enrollment guide for detailed instructions
- The enrollment process may take up to 48 hours to complete
3. Create a Bundle Identifier
The Bundle ID uniquely identifies your app within Apple’s ecosystem:
📘
Your Bundle Identifier should use the reverse-dns name structure.
For example, if the domain you will use for this app is example.com, set your Bundle Identifier to com.example.appname.
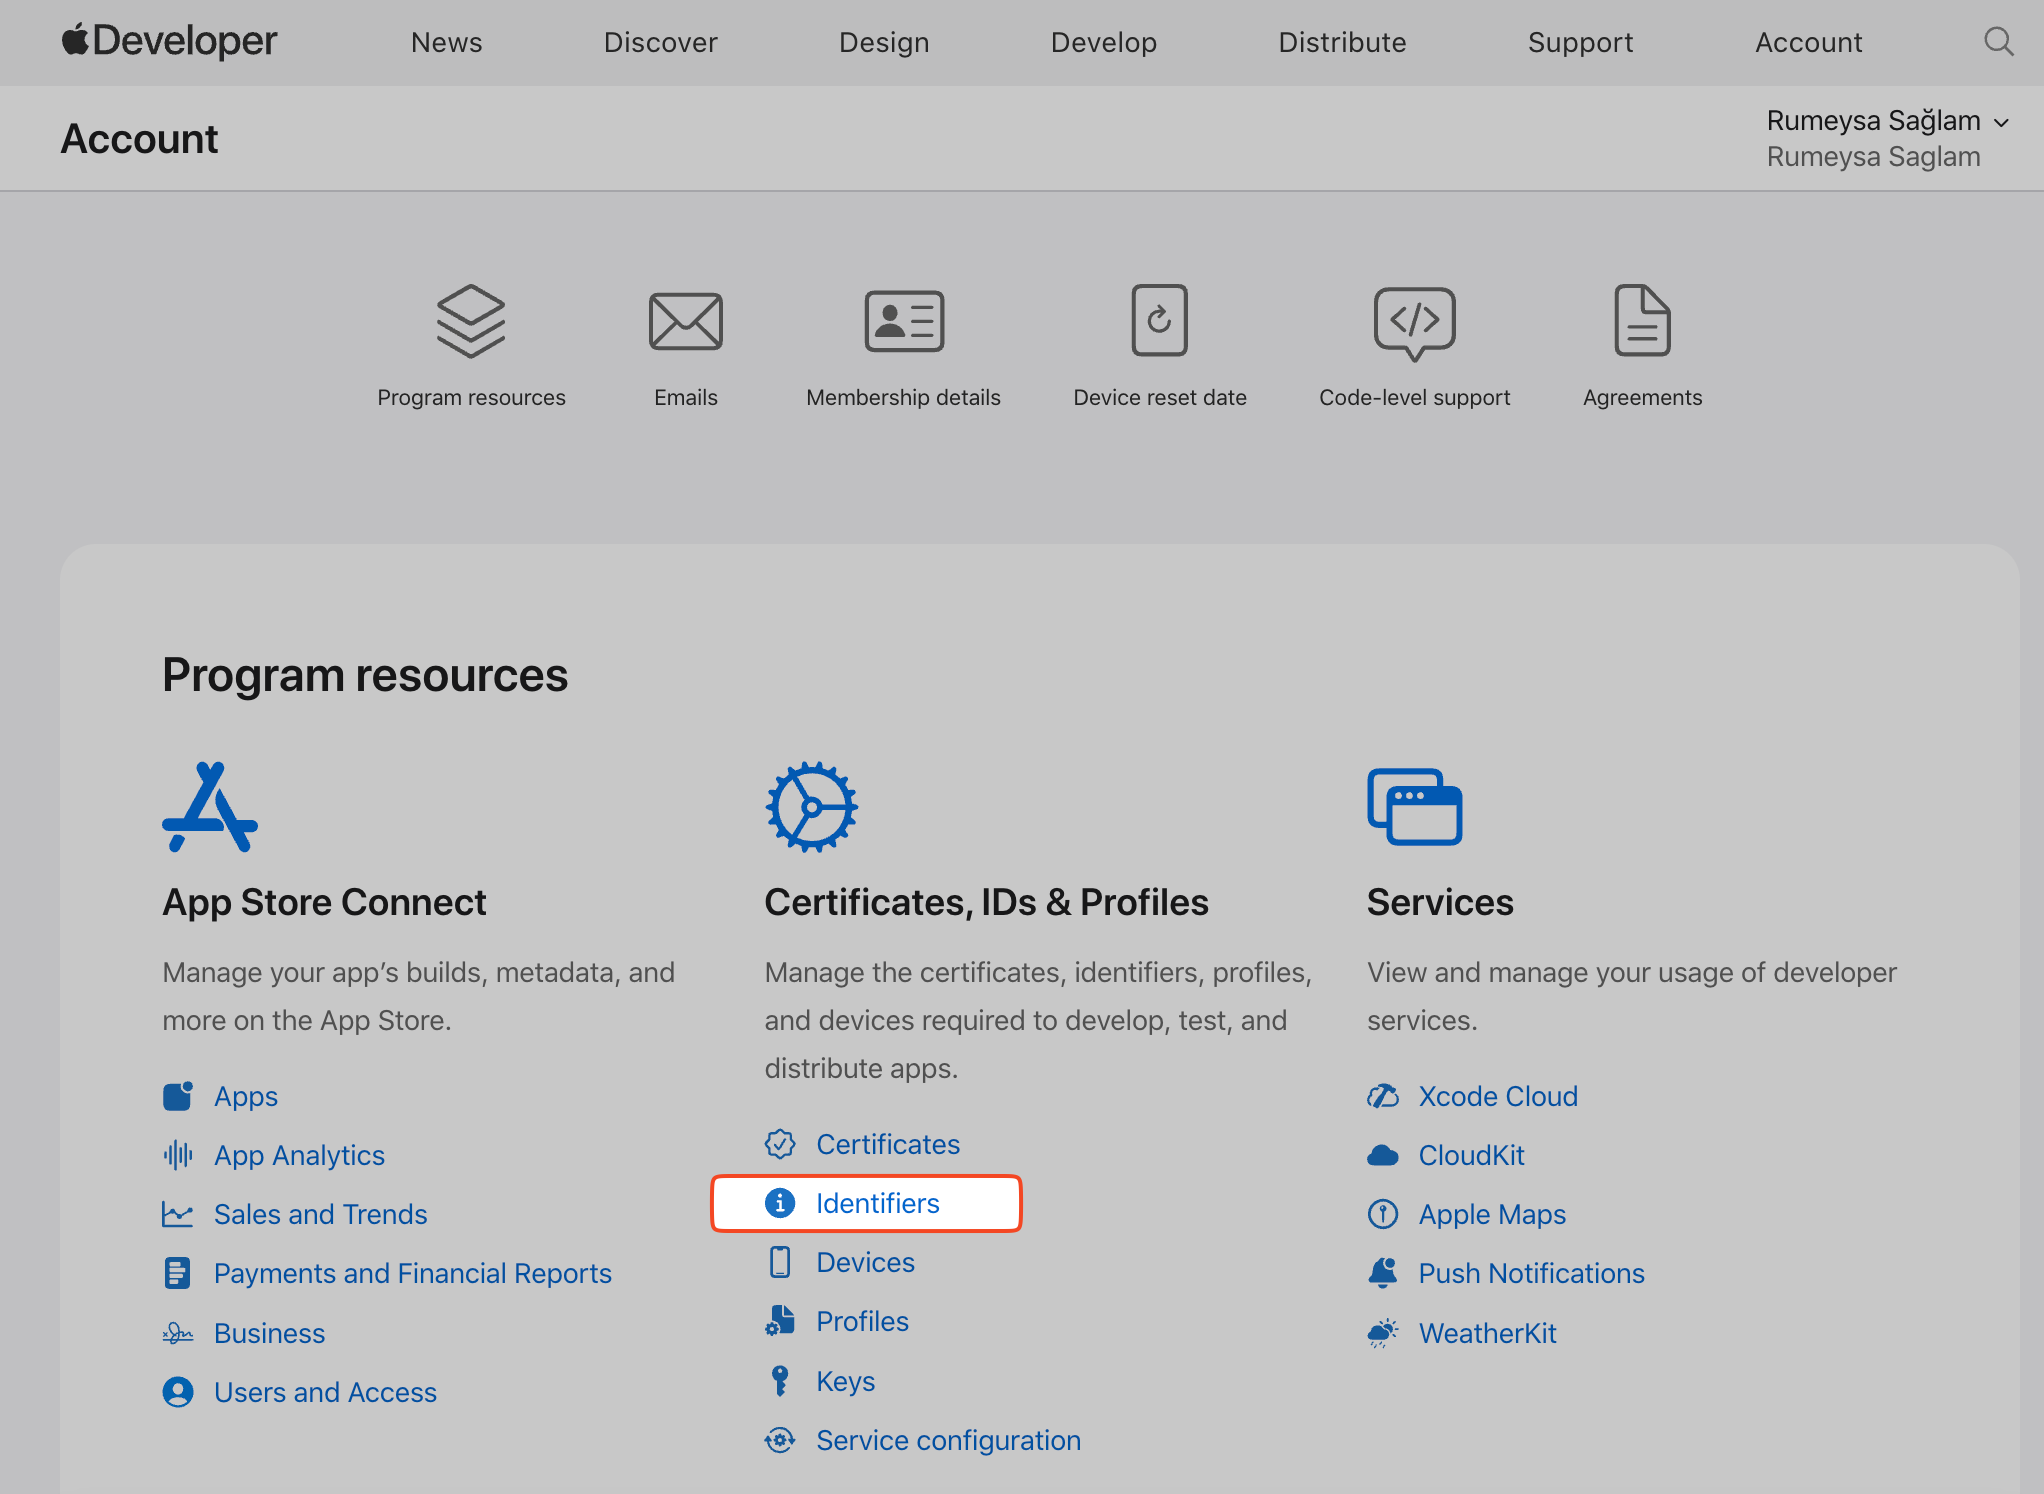
- Log in to the Apple Developer Portal
- Navigate to Certificates, IDs & Profiles → Identifiers → App IDs
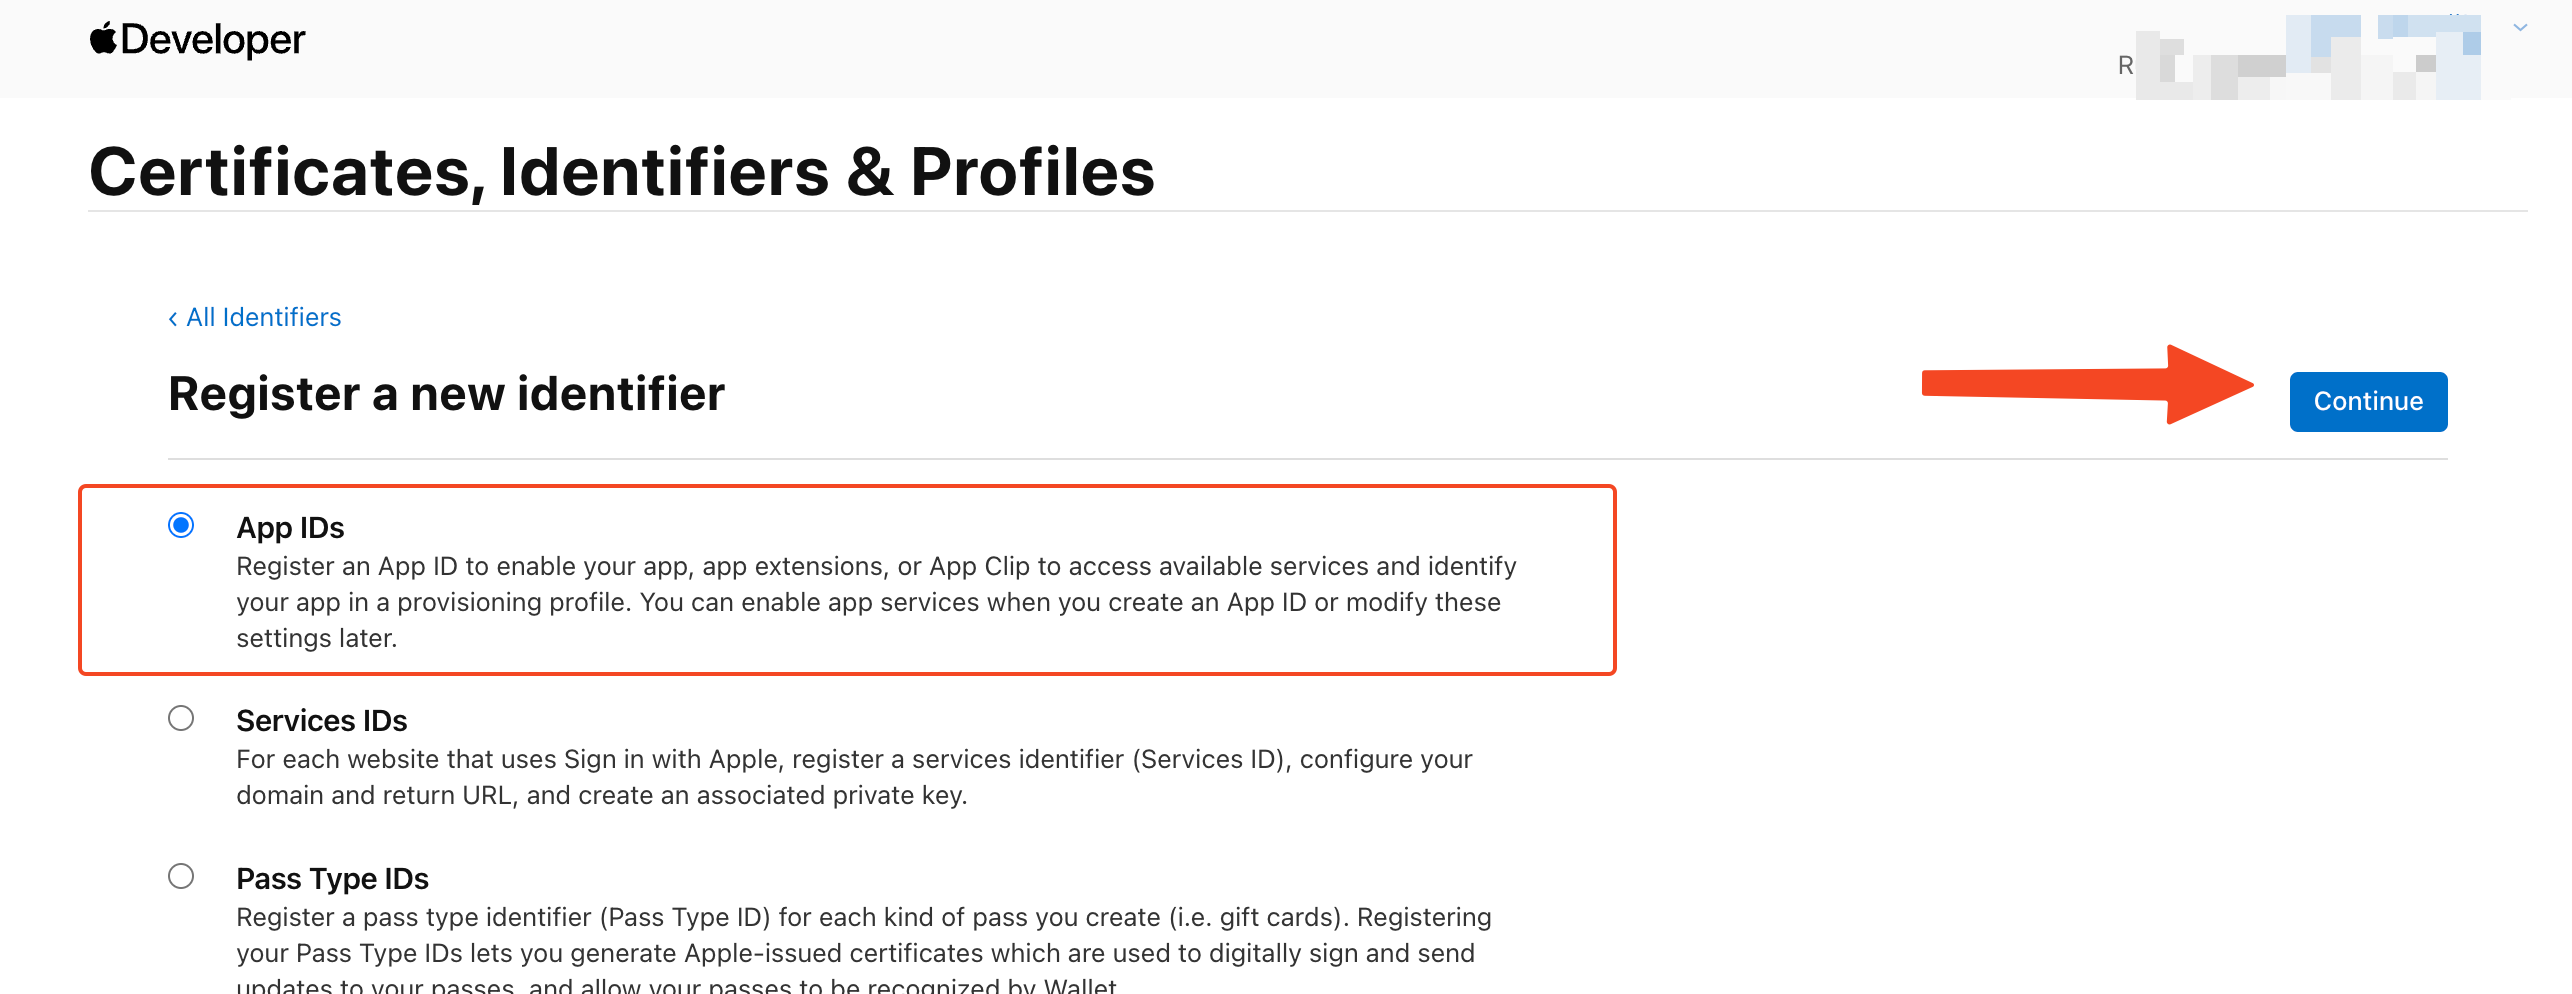
- Click the + button to create a new Bundle ID
- The Register a new identifier page will open. Select App IDs and then click Continue
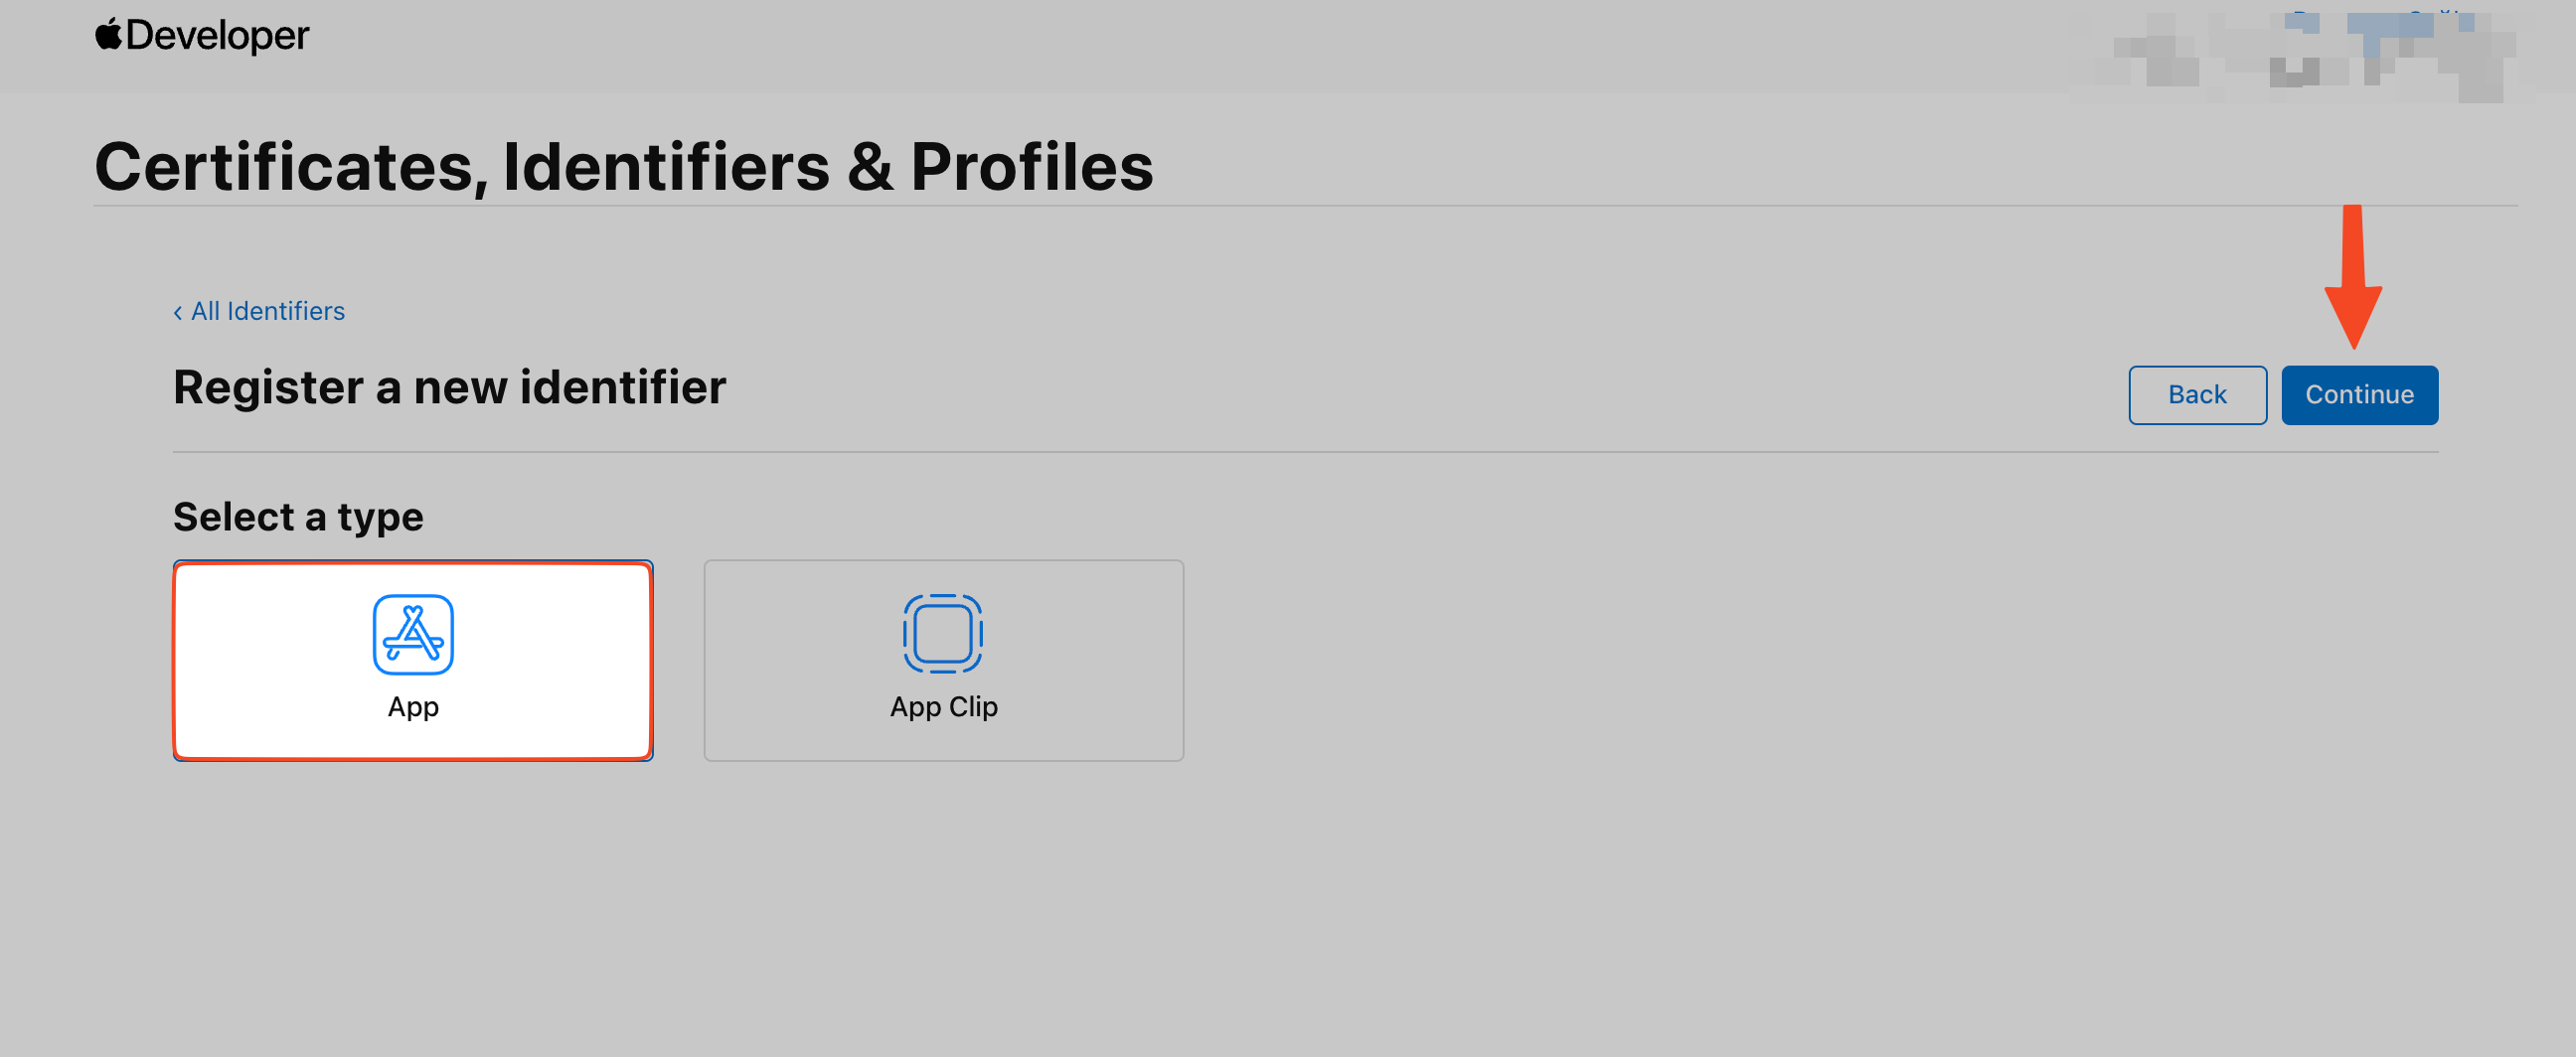
- Select App and then click Continue
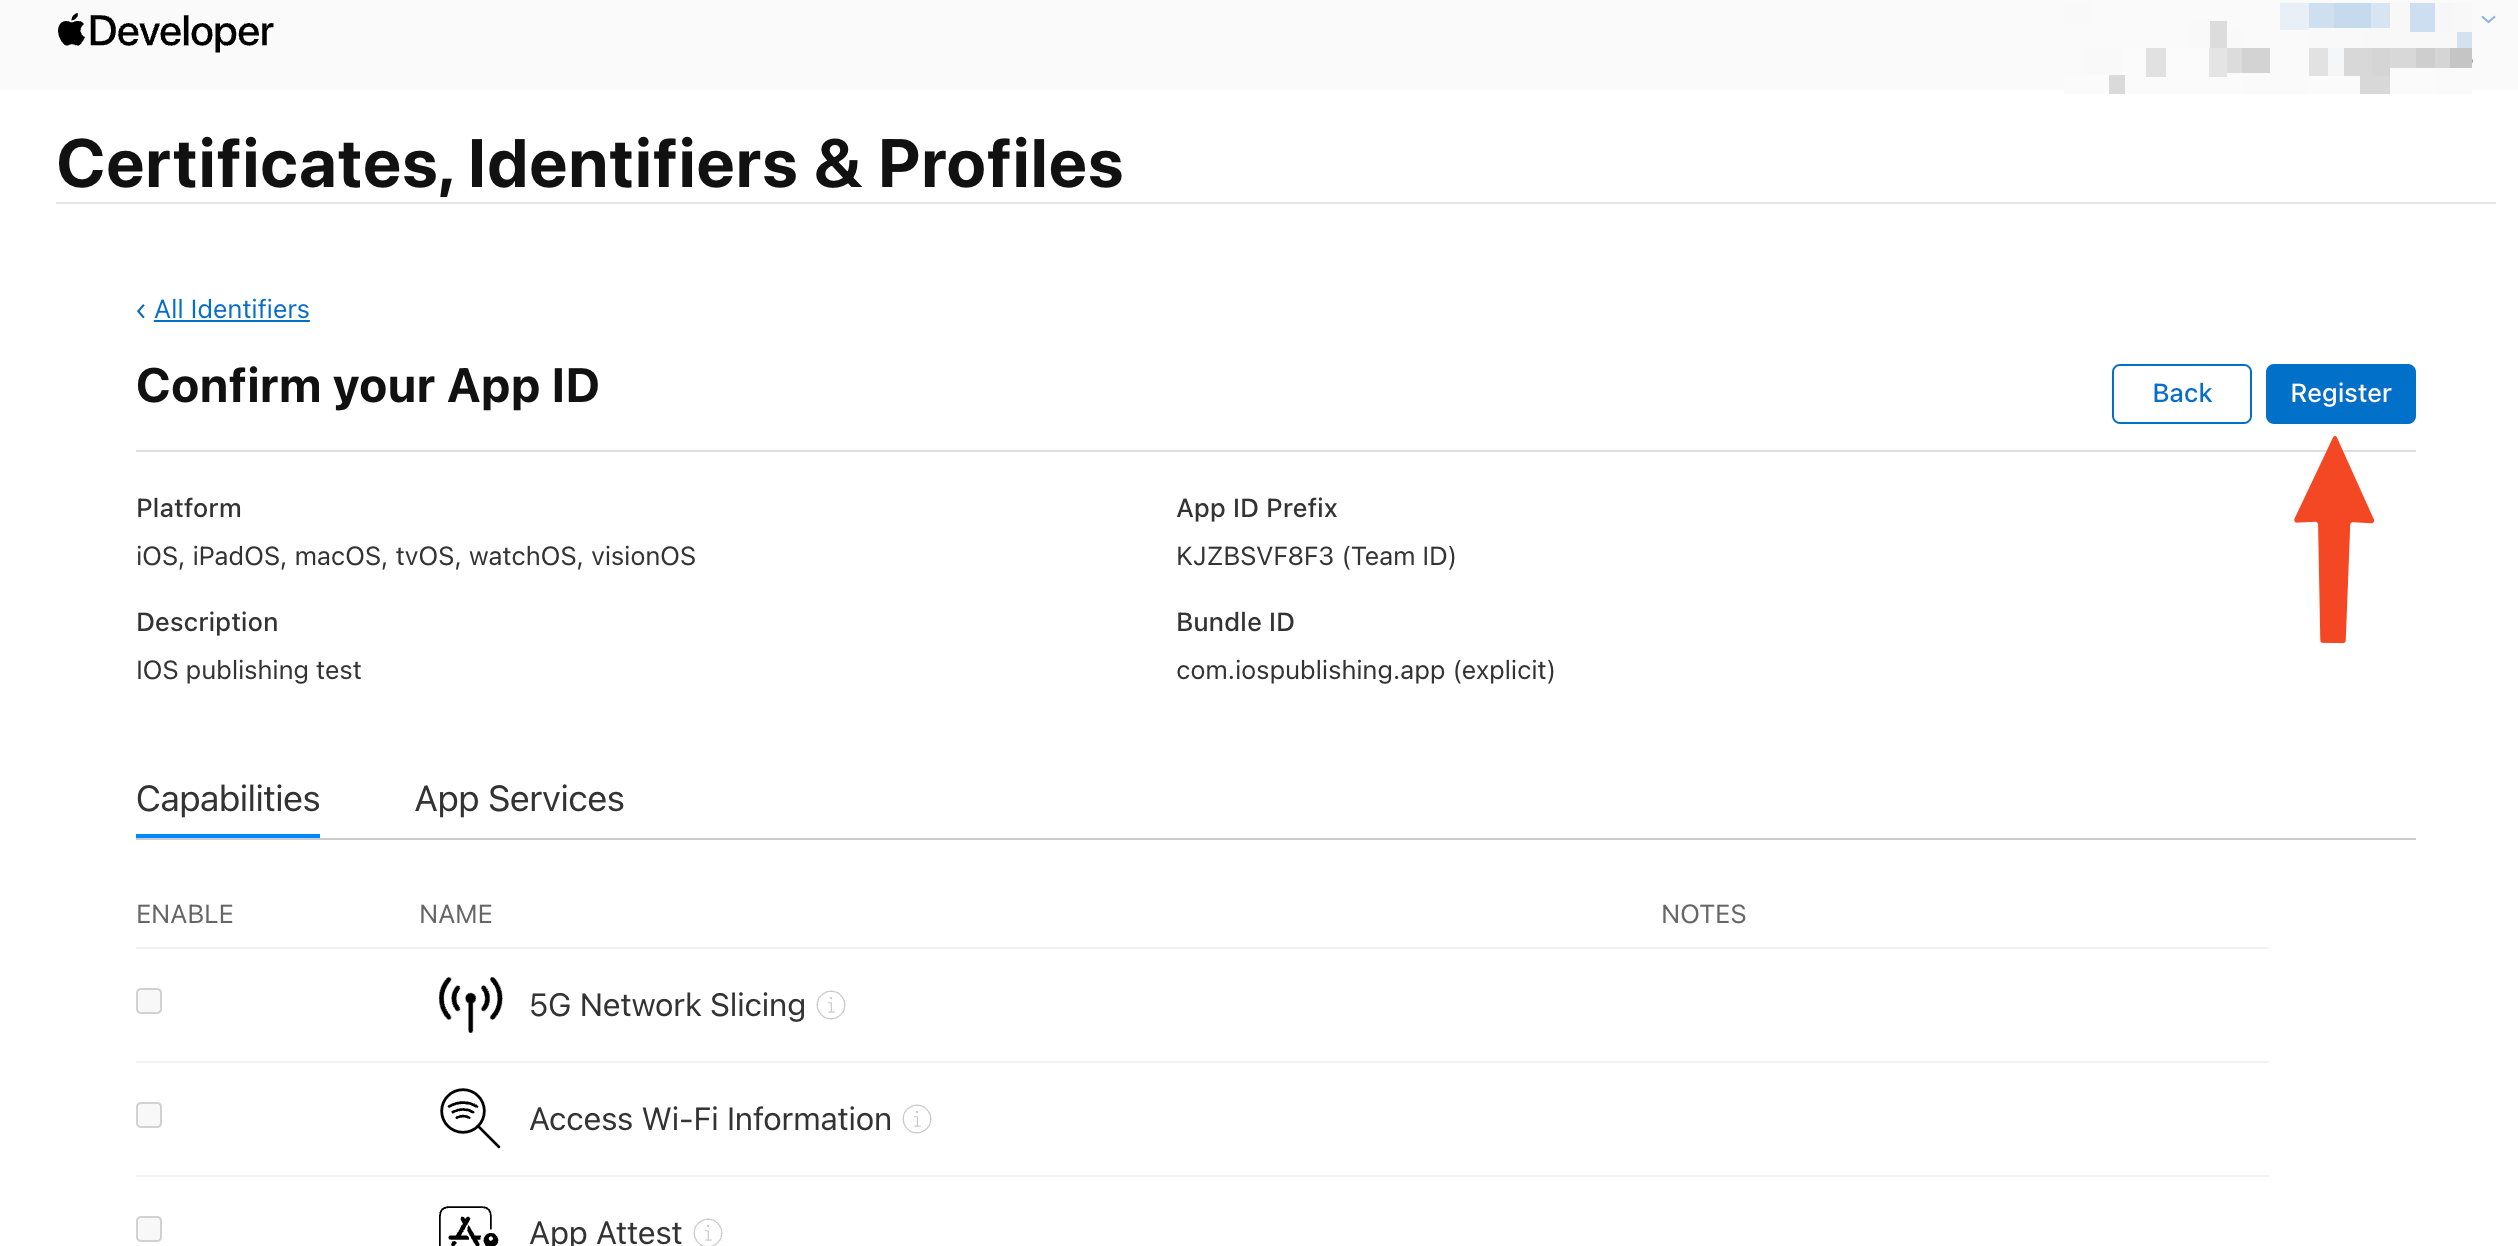
- Enter the Apple Bundle information:
- Bundle ID: Use a reverse-DNS format (e.g.,
com.yourcompany.yourapp)
- Description: Enter a short description for your Bundle
- Capabilities: Scroll down and select the capabilities that are required for your app
📘
Bfloat AI requires Push Notifications for real-time AI updates, so check the box next to that capability.
- When you are finished, select Register.
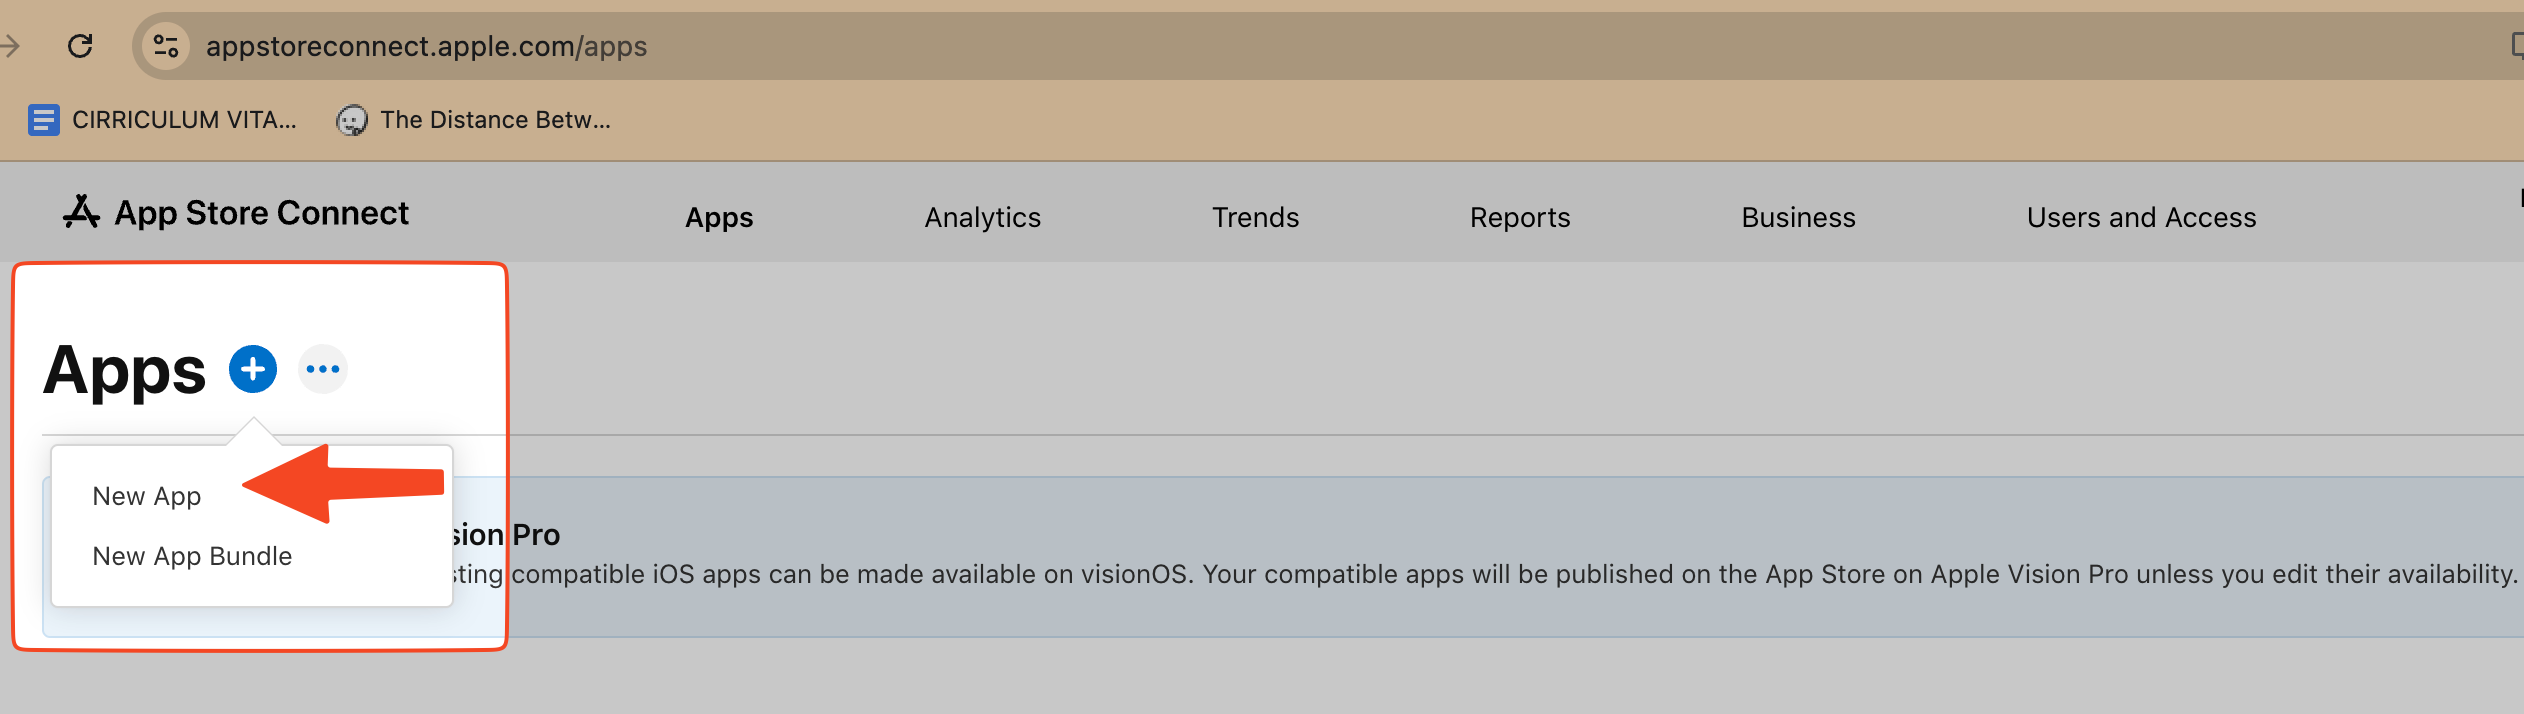
Add A New App To App Store Connect
Now, you need to add your Bfloat AI app to App Store Connect, which is where you will manage and submit your app to the App Store.
- Log in to App Store Connect
- Navigate to My Apps
- Click on the + button and select New App
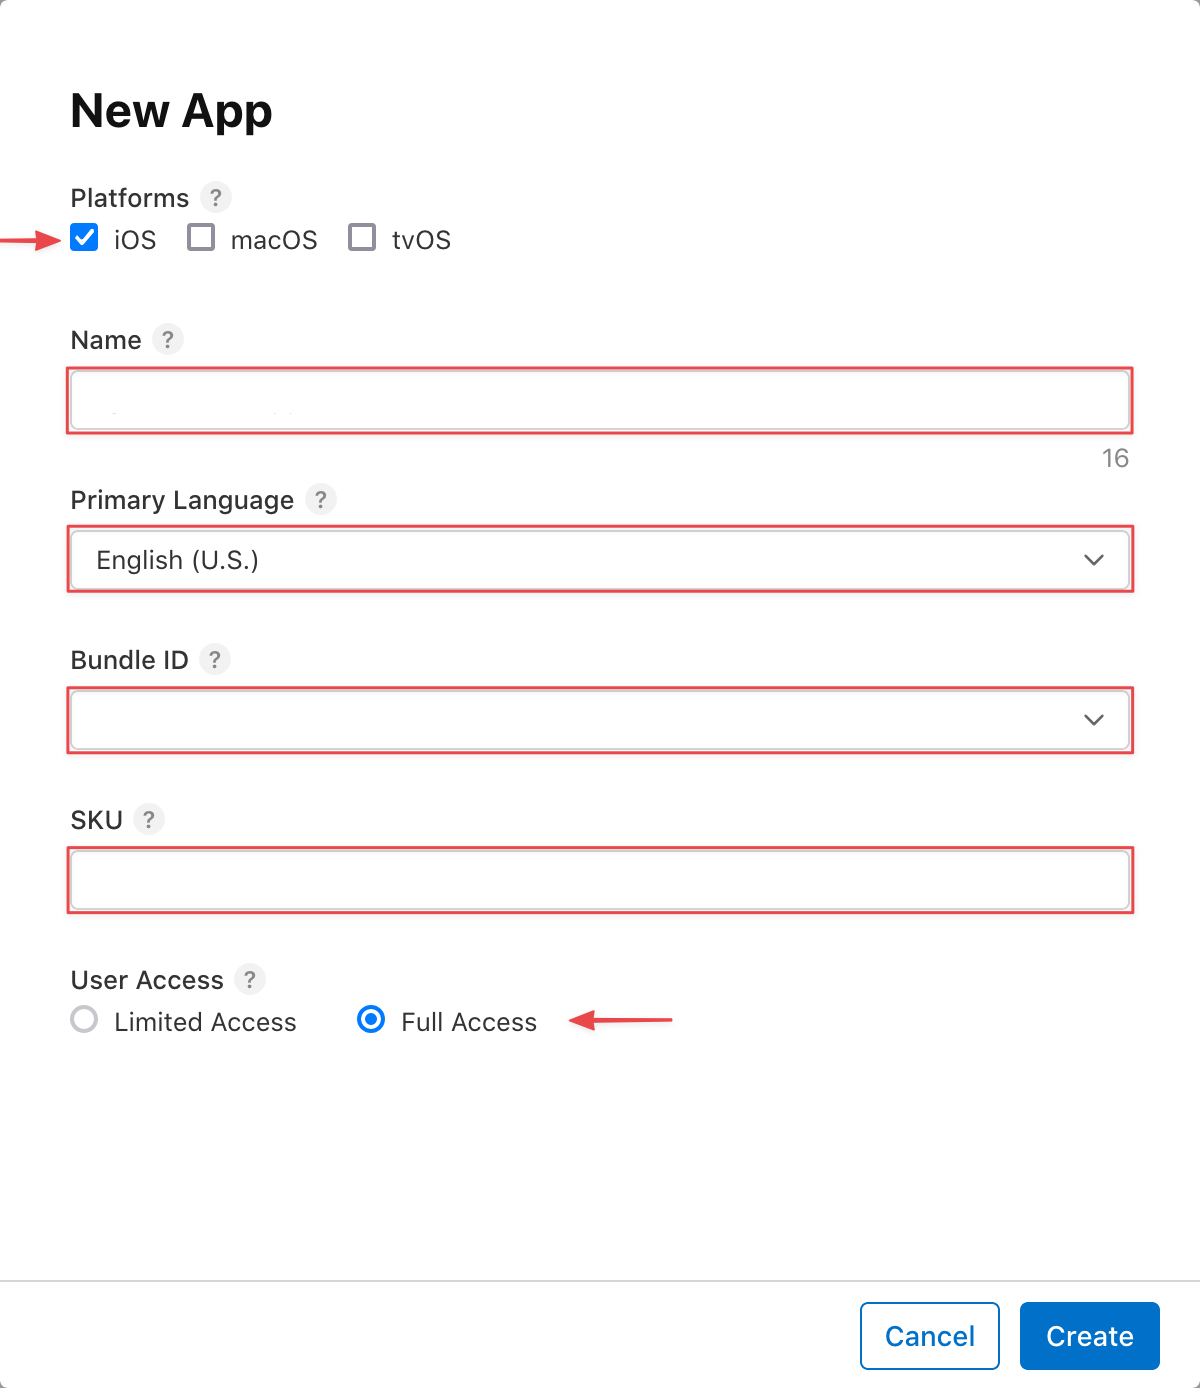
-
Enter your app information in the modal that appears:
- Platform: For mobile AI apps, this will be iOS
- Name: Enter a name for your app (this is the name that will show in the App Store)
- Primary Language: Select the primary language for your app
- Bundle ID: Select the Bundle ID you created in the previous step
- SKU: Enter a unique identifier. We recommend using your Bundle ID here, as long as it’s unique
- User Access: You should leave this set to Full Access unless you intend to only use this app privately
-
When you are done, select Create.
Generate Your App Store Connect API Key
To allow Bfloat AI to publish your app, you need to generate an API Key:
- In App Store Connect, go to the Users and Access page and select the Integrations tab at the top
- If you see the Request Access button, click on it
- Click on the Generate API Key (or select the Add button (+) if you’ve added keys before)
- Enter your API Key Information in the modal that appears:
- Name: Enter a name for the key (we recommend ‘Bfloat AI Publishing’)
- Access: Select App Manager as the access type
- When you are done, select Generate
- Find the row for the API Key you just generated and select Download API Key
- A modal will appear; select Download (refresh the page if the link doesn’t appear immediately)
Add API Key and Issuer ID To Bfloat AI
- In App Store Connect, go to the Users and Access page and select the Integrations tab
- Find the Issuer ID and select Copy
- Return to Bfloat AI and then:
- Click on your avatar (profile photo) in the sidebar
- Select Settings
- In the Settings page, select Integrations
- Scroll down to App Store Connect
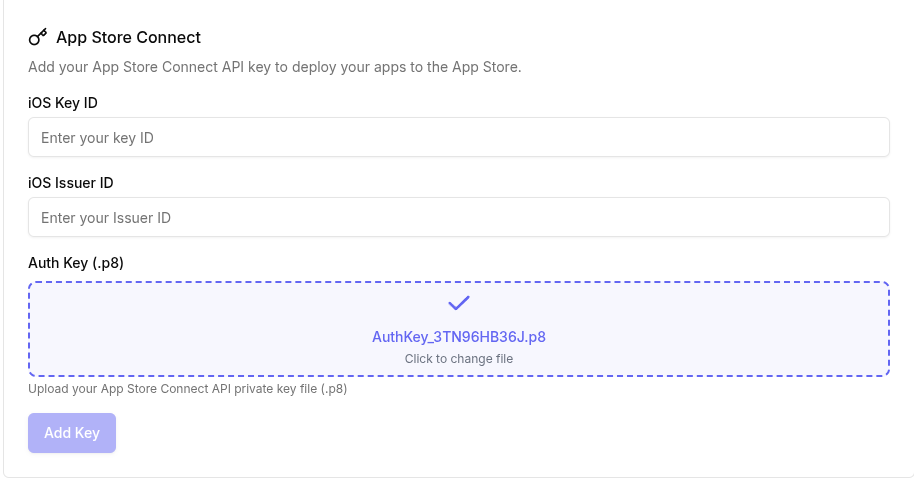
- Upload the API Key file that you downloaded (ending in .p8)
- Add the Key ID and Issuer Identifier
- Click the Add Key button
Connect Your App to Bfloat AI
After setting up App Store Connect, you need to link your app to your Bfloat AI project:
- In the Bfloat AI dashboard project page, open your Project Settings
- Enter your Bundle Identifier (must exactly match what you created in Apple Developer Portal)
- Enter your App ID (the unique identifier from App Store Connect)
- Upload your app icons
- Click Save Changes to confirm your changes
To complete the iOS publishing process, visit the iOS Publishing page.